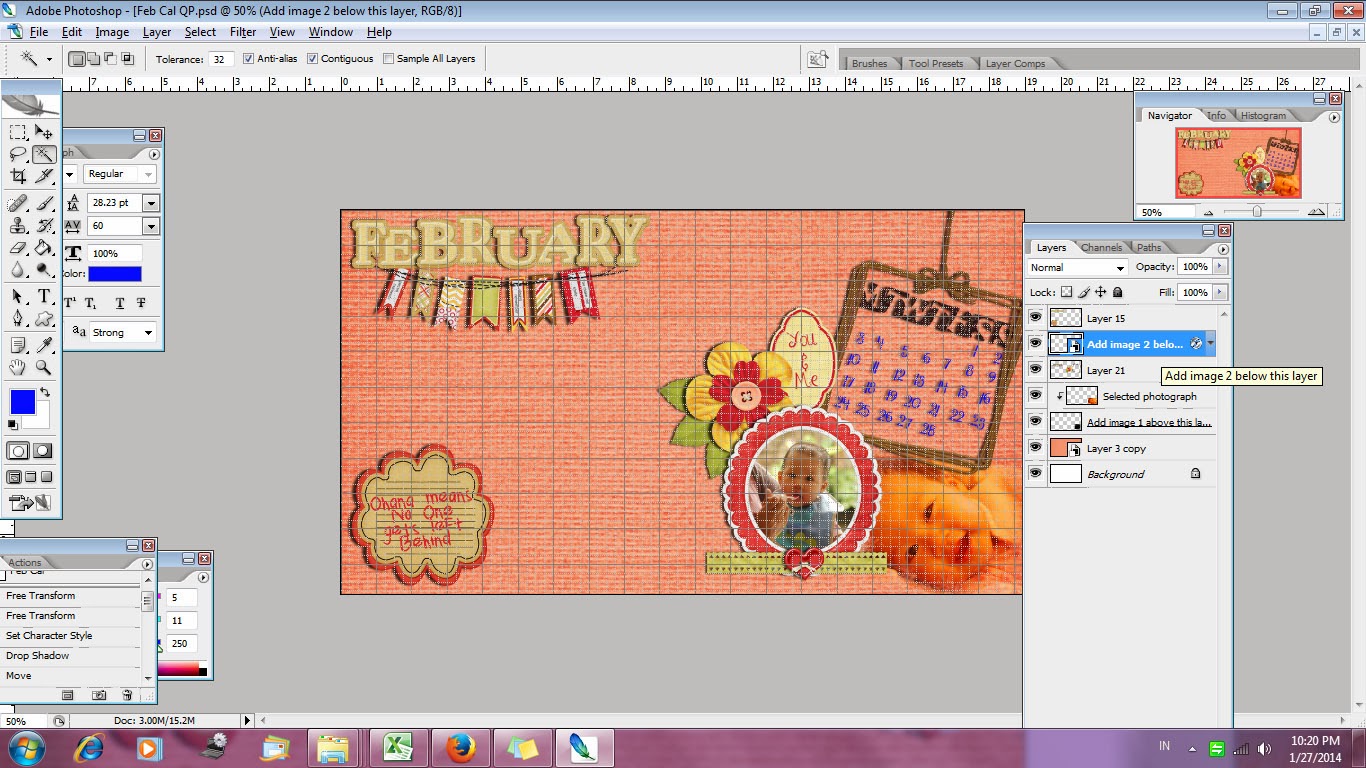
As January is coming to an end and special month February is just waiting around the corner. It's time to share the February calendar quick page for your desktop.
February is always the month of love. Even though people are always shouting out on the street that everyday should be the day to share love, February will always be a sweet month for chocolate manufacturer. The sales of chocolate is always at their peak. Therefore in the mood of celebrating the month of love, February calendar will be extra pink by using a mini kit from Digiteedesigns : cherished. Below is a preview of what you can get. By the way, in order to fit my wide screen 13in laptop, I changed the format to 1366x768 pixels. Hope this format will fit perfectly to your screen as well. Enjoy!
Tutorial on adding the photo.
1. To add the picture with photo mask
- If you open the quickpage psd file, you can see that I have 6 layers of image
- Select your desired photograph, and place it above layer "Add image 1 above this ...."
- Right click on you selected photograph layer and choose "create clipping mask"
- Voila! Now all you need to do is nudge the picture a bit so it perfectly fits to the photo mask
2. To add the picture in Oval Frame
- Double click on layer "Add image 2 ...." , click OK on the popup message and you will be directed to a new workspace
- This new workspace contains a frame layer, and a photograph layer.
- Add your favorite photograph to the workspace, put it below "Layer 7"
- Put all layers on hide except for Layer 7, choose the magic wand and select the area inside the oval frame
- Now activate the layer with your selected photograph, and unhide the layer. Click ctrl+shift+i , you can see now the selected area is shifted
- Click "delete", and you have cleared any excess photograph that doesn't fit the frame
- Save your work and exit the Layer 7 workspace, go back to your QP workspace, and the picture is changed already
Now, you can totally enjoy your February calendar!


0 Comments:
Post a Comment